


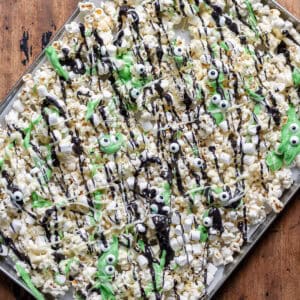
Halloween Monster Popcorn is an easy, no-bake Halloween treat made with popcorn, three colours of white chocolate, marshmallows and candy eyes.
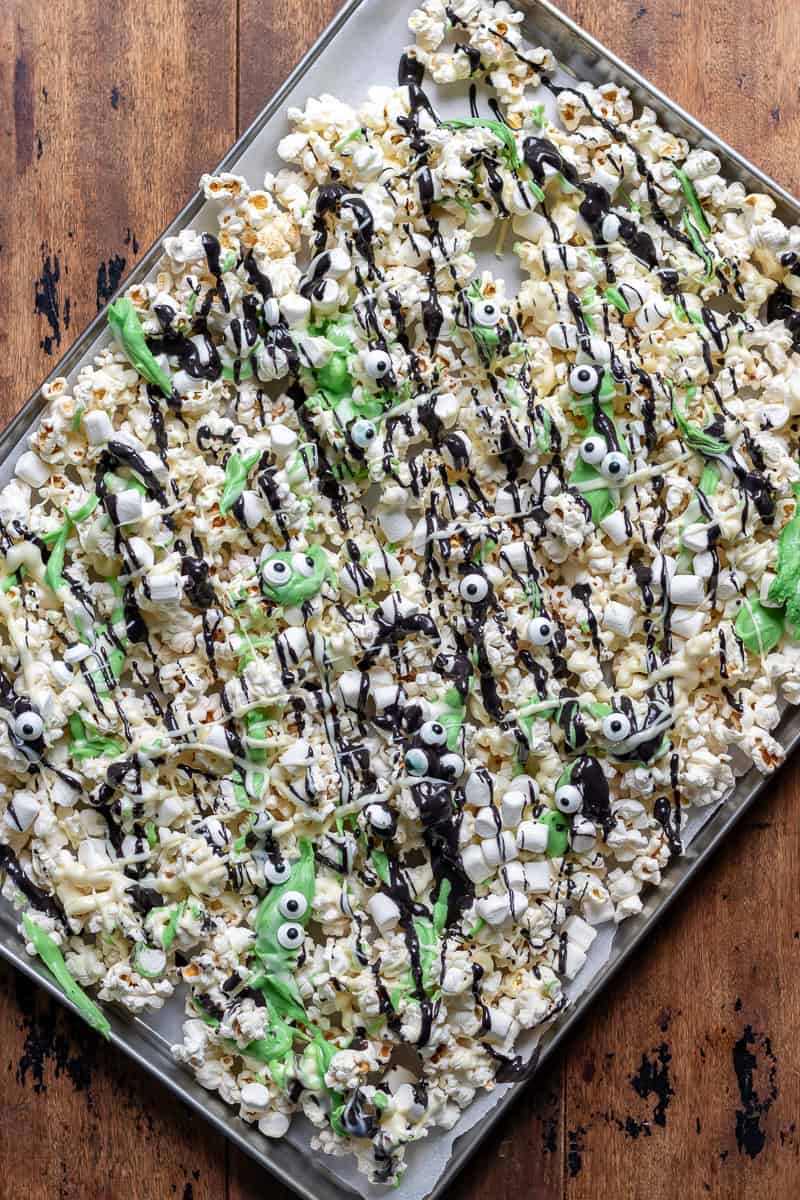
There's something particularly satisfying about making Halloween treats that look impressive without requiring hours in the kitchen. This Halloween Monster Popcorn is exactly that sort of recipe!
The base is ordinary popped popcorn, but a drizzle of white chocolate transforms it into something much more interesting. Part of the chocolate stays white, another portion turns bright green, and the third becomes almost black with the addition of black cocoa powder (or you can use regular cocoa powder and a little black food colouring).
Once everything has set, the popcorn breaks into irregular clusters, with little marshmallows and candy eyes tucked between the pieces.
The contrast is what makes it work. The popcorn is light and crisp, the chocolate adds sweetness and a gentle snap, and the marshmallows bring a softer, chewy texture. If you use lightly salted popcorn, the salt also helps balance the sweetness.
I prefer drizzling the chocolate rather than completely coating the popcorn. A heavy coating can make the finished mixture overly sweet and quite dense. With a drizzle, you still get plenty of chocolate, but the popcorn remains the main ingredient.
One thing worth knowing before starting is that white chocolate needs gentle heating. It can become thick or grainy if overheated, so I melt it gradually and stir thoroughly between microwave bursts.
You'll also want all your decorations ready before you begin drizzling. The chocolate can start setting surprisingly quickly, especially in a cool kitchen.
This is an excellent recipe when you need a Halloween snack that can be prepared in advance. It works for school celebrations, family movie nights, Halloween dessert tables and party favour bags.
Jump to:

Why You'll Love This Recipe
- Very little preparation. The popcorn and decorations come together in around 15 minutes, with no oven required if you're using a microwave.
- Easy to make ahead. The clusters can be prepared before a Halloween party, leaving you with one less job on the day.
- Simple ingredients. Most of the recipe uses supermarket baking ingredients, with black cocoa and candy eyes providing the seasonal details.
- A good balance of textures. Crisp popcorn, smooth chocolate and soft marshmallows make each handful slightly different.
- Easy to portion. Serve it in a large bowl, individual paper cups or small Halloween treat bags.
- Flexible decorations. You can change the sprinkles, colours and sweets to suit different Halloween themes.
- Children can help decorate. Once an adult has handled the hot chocolate, children can scatter marshmallows and candy eyes over the popcorn.
Ingredients
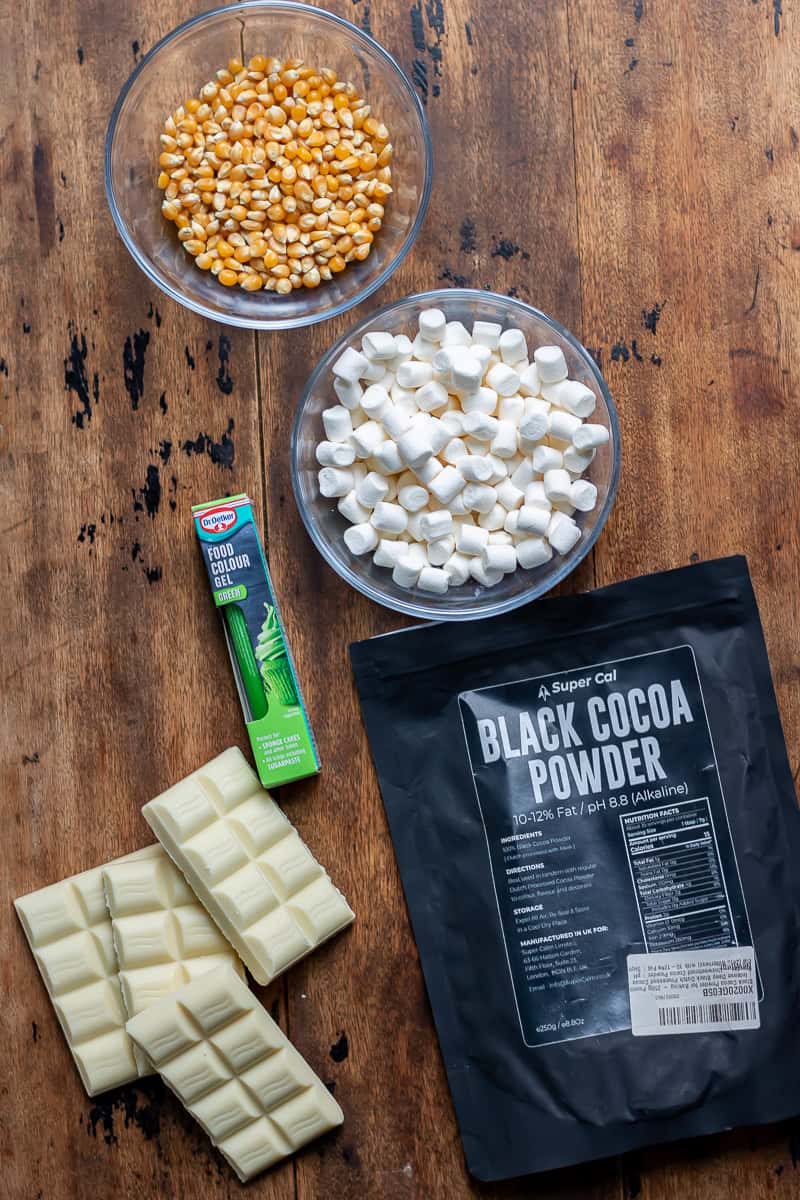
You only need simple pantry ingredients for this recipe!
- Popcorn Kernels - Plain popping corn gives you a fresh, crisp base. Choose good-quality kernels and remove any that don't pop. Ready-popped, lightly salted popcorn is a convenient alternative.
- White Chocolate - Provides the sweet coating and creates the three coloured drizzles. Choose a variety that melts smoothly and chop bars into small pieces before heating.
- Mini Marshmallows - Add a soft, chewy contrast. Small marshmallows work better than large ones because they distribute more evenly.
- Black Cocoa Powder - Gives one portion of chocolate its dark, almost black appearance. Ordinary cocoa powder works as a substitute but produces a lighter brown colour. You can add a few drops of black food colouring.
- Coconut Oil - Helps loosen the chocolate mixed with black cocoa. Refined coconut oil has a more neutral flavour.
- Green Gel Food Colouring - Creates the monster-green chocolate. Oil-based chocolate colouring is preferable if available.
- Candy Eyes - Add colour and character. Choose small decorations that will stick easily to the chocolate.
See the recipe card for quantities and method.
How to make Halloween popcorn
Follow these step-by-step instructions, then scroll down for the full ingredients list and method.
Scroll down for the full ingredients list and method.

Pop the popcorn kernels using your preferred method.

Spread the popcorn over a large baking sheet lined with baking parchment.

Aim for a fairly even layer, without too many pieces piled on top of one another.
Remove any unpopped kernels. They're easy to miss once the chocolate has been added and can be unpleasant to bite into.
Allow freshly popped popcorn to cool completely before adding chocolate. Warm popcorn can soften the coating and delay setting.

Place the chopped white chocolate in a microwave-safe bowl.
Heat in 30-second bursts at reduced power, stirring thoroughly between each burst. As it becomes mostly melted, shorten the intervals to 10-15 seconds.

Stop heating when a few small pieces remain and stir until smooth. The residual warmth will usually finish melting them.

Divide the melted chocolate between three small bowls.
Leave one portion white.
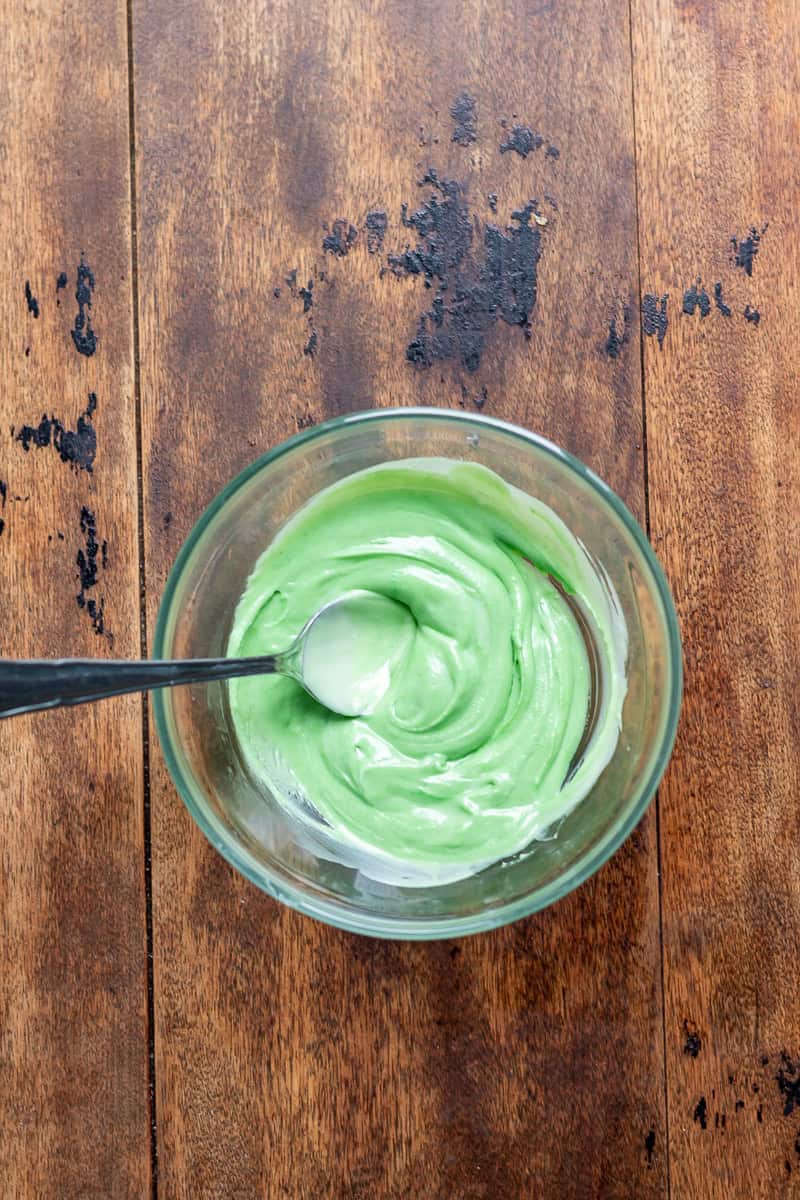
Add a few drops of green food colouring to the second bowl, stirring gently. Stop once you've reached a bright green shade.

In the third bowl, stir in the coconut oil, followed by the black cocoa powder.

Mix until the cocoa is fully incorporated and the chocolate is smooth enough to drizzle.
If either coloured portion thickens, avoid adding water. A small amount of melted coconut oil may help loosen it.

Using a spoon, drizzle the white chocolate over the popcorn hten repeat with the green and black chocolate.

Don't worry about covering every piece. The uncovered popcorn helps keep the mixture light and crunchy.
While the chocolate is still wet, scatter over the mini marshmallows and candy eyes. Work fairly quickly so the decorations stick before the chocolate firms up.
Leave the popcorn at cool room temperature for approximately 30 minutes, or until the chocolate feels firm.
Once set, gently break the popcorn into clusters. Transfer to a serving bowl or airtight container.
Serving Suggestions
- Halloween Party Bowls. Serve in a large bowl so guests can take a handful without needing plates.
- Individual Paper Cups. Small Halloween-themed cups make portioning easier at children's parties.
- Halloween Movie Nights. Pair with ordinary salted popcorn to balance the sweeter snack.
- Gatherings. Offer small portions of Halloween Monster Popcorn alongside biscuits and fruit for a varied snack table.
- Autumn Picnics. Pack in airtight containers and keep away from direct sunlight so the chocolate doesn't soften.
- Halloween Barbecues. Serve as a sweet snack after grilled burgers or hot dogs.
- Lunchbox Treats. Include a small portion for older children where school food policies permit.
- Dessert Boards. Arrange with brownies, chocolate-dipped strawberries and Halloween biscuits.
- Party Favour Bags. Portion into food-safe bags once the chocolate has completely set.
- After-Dinner Treats. Serve small bowls with coffee, hot chocolate or warm apple cider.
Storage
I prefer storing this popcorn at cool room temperature because refrigeration can introduce moisture and make the popcorn lose its crispness.
If your kitchen is particularly warm, refrigeration may be necessary to prevent the chocolate from softening. Use an airtight container and expect some change in texture.
For the best texture, enjoy the popcorn within 2-3 days. Store it somewhere cool, dry and away from direct sunlight.
More Halloween Recipes


Recipe Tips
- Use completely dry equipment. Even a small amount of water can cause melted chocolate to seize and become thick.
- Avoid heavily buttered popcorn. Excess butter can leave the popcorn greasy and interfere with the chocolate coating.
- Keep the popcorn in a single layer. This helps the chocolate reach more pieces without needing to stir everything together.
- Use colouring suitable for chocolate. Water-based colouring can make white chocolate stiff or grainy.
- Have decorations ready before melting. This prevents the chocolate from setting while you're searching for sprinkles.
- Don't add too much black cocoa. It absorbs fat and can make the chocolate difficult to drizzle.
- Break the Halloween Monster Popcorn clusters gently. Pulling them apart rather than crushing them preserves the popcorn's crisp texture.
- Allow the coating to set fully before storing. Otherwise, the clusters may stick together inside the container.
Be sure to subscribe to my free Newsletter and follow me on Facebook and Pinterest for more tasty recipes!
📖 Recipe
Halloween Monster Popcorn
Equipment
- Popcorn maker
- Baking Sheet
Ingredients
- ⅓ cup popcorn kernels popped (or about 8 cups plain popped popcorn)
- 7 ounces white chocolate
- 1 teaspoon coconut oil
- 1 teaspoon black cocoa
- Few drops green gel food colouring
- ¾ cup mini marshmallows
- Candy eyes
Instructions
- Pop the popcorn and remove and discard (or pop) any unpopped kernels. Spread the popcorn over a large parchment-lined baking sheet.
- Melt the white chocolate in 30 second bursts in the microwave and stir until smooth.
- Divide the melted chocolate into three bowls.
- Stir the coconut oil into one of the small bowl until it melts, (the cocoa will absorb moisture, so it's only this bowl that needs the coconut oil), then stir in the black cocoa until smooth.
- Stir a few drops of green gel food colouring into another bowl to get a bright green colour. Leave the final bowl white.
- Drizzle the white, green and black chocolate all over the popcorn on the baking sheet.
- While the chocolate is still wet, scatter it with the mini marshmallows and candy eyes.
- Leave until the chocolate has set, about 30 minutes, then break everything apart into messy clusters.
Notes
-
Use completely dry equipment. Even a small amount of water can cause melted chocolate to seize and become thick.
-
Avoid heavily buttered popcorn. Excess butter can leave the popcorn greasy and interfere with the chocolate coating.
-
Keep the popcorn in a single layer. This helps the chocolate reach more pieces without needing to stir everything together.
-
Use colouring suitable for chocolate. Water-based colouring can make white chocolate stiff or grainy.
-
Have decorations ready before melting. This prevents the chocolate from setting while you're searching for sprinkles.
-
Don't add too much black cocoa. It absorbs fat and can make the chocolate difficult to drizzle.
-
Break the clusters gently. Pulling them apart rather than crushing them preserves the popcorn's crisp texture.
-
Allow the coating to set fully before storing. Otherwise, the clusters may stick together inside the container.
Nutrition
The nutritional information provided is approximate and can vary depending on several factors, so is not guaranteed to be accurate. Please see a registered dietician for special diet advice.


Comments
No Comments